(De Nederlandse versie van deze blog staat op
Probably you know about watercolour pencils. They’re pencils of which
the colour is soluble in water. You make a drawing, put on some water … and it
looks like watercolour! Sounds easy … but is it really? What do you have to
know to do it yourself?
Don’t buy a cheap box of watercolour pencils in a supermarket! The cheap
stuff is of bad quality, not nice to work with. Good pencils the special store
for artist materials sells the piece. You can take some colours you like to
start with. Later on you buy some more. I use Caran d’Ache Supracolor Soft.
There are more good brands. The shop owner can advise you.
When you have your pencils, test them. Draw squares on a piece of
watercolour paper. Colour in two squares side by side in one colour. Make the
colour go from light to fierce and back again. Then you take water, dip a small
watercolour brush in, and work over one square only. The other square stays
dry. Start at the light part and work towards the part with more colour,
enforcing the flowing effect.
You do this with all of your colours. You’ll remark they don’t all react
the same to water. Now you’ve done this test you can take account with that.

Test of my watercolour pencils
The right paper is important too. You use water, so ordinary drawing
paper isn’t right. Use strong watercolour paper. You can buy it in the same
shop as the pencils. Ask for a brand of paper that can handle all layers of
pencils and water. There is ‘rough’ and ‘smooth’ paper. You could try both to
see the difference.
Nu we start drawing! You draw with watercolour pencils, but the end
result can look like a (watercolour) painting.
First you do the ‘lay-out’ (or ‘sketch’). You mark the setting of all parts of the drawing on the paper. I use watercolour pencils to do that. I draw the lay-out in a neutral colour (grey or brownish), or in the colours I’ll use in the drawing. This lay-out will be invisible at the end.
First you do the ‘lay-out’ (or ‘sketch’). You mark the setting of all parts of the drawing on the paper. I use watercolour pencils to do that. I draw the lay-out in a neutral colour (grey or brownish), or in the colours I’ll use in the drawing. This lay-out will be invisible at the end.
I draw from photos or from my imagination. Often I first sketch the
subject in pencil or pen on printer paper. So I get acquainted with shapes and sizes
of my subject. When I use a reference photo I measure accurately before putting
shapes on my watercolour paper. I don’t use a ‘grid’, I use a ruler to measure.
If you want to use a grid, draw it very lightly in graphite pencil, erase it
when the lay-out in watercolour pencil is ready. You can’t erase watercolour
pencils.

Children portrait, lay-out in watercolour pencils
I explain the way I work. You do not need to work the same way. There
are so many methods for drawing! Do it the way you like.
I often start in ‘shadow colours’. That’s not easy to explain. I analyse
the colour I will put on. Maybe it looks like brown … but it’s a shadow of a
reddish colour … I won’t take a brown pencil. I might start with a dark green.
When I go over the green with the reddish colour, they both mix and become
brownish. If it still doesn’t look the way I want, I put on more colour(s).
It’s more like ‘feeling the right colours to use’. When I’m drawing from
imagination it’s all ‘feeling’.
In this way I colour all of the drawing in one or more layers. Only
white parts have no colour (nor white pencil).

Children portrait, first coloured layer after first wash with
water
The first layer of colour is not fierce. First I ‘wash’ my drawing with
water. I use a small watercolour brush. In the test I wrote how to do it. For
every new shape I rinse my brush in water. Some shapes have flowing colours and
I want to enforce that. In that case I put a lot of water on my brush and work
on until that shape is finished. If that isn’t possible, I take new water on my
brush and go on in the wet part where I was before.
In a portrait I often want a nice flow from white to colour. Then I
start with my wet brush in the white and work over to the coloured part.
When all of the drawing is washed with water, it has to dry thoroughly.
If you go on with watercolour pencils when the paper is still wet, you’ll get
unexpected effects … Maybe that is what you want … the explanation comes later.
A day (or more) later I go on. If I see some change in shapes is needed,
it’s still possible, the colours are still light now. In the following layers I
make the colours stronger, more fierce. Sometimes I add more layers of the same
colour, but often I work over in different colours.

Children portrait, end result
You can add a texture in parts of your drawing. You use small lines, or
other doodles, to get that texture. These texture lines you make with more pressure
on the pencil, in the first layer. I often use a ‘shadow colour’. When you
brush it with water, more colour will stay in the lines, and less in the parts between.
In the next layer you put colour all over. After the wash then, a darker
mixture will stay in the lines. This is a way to draw fur, hairs, etc. Use
smooth watercolour paper, because rough paper has a texture of its own.

Illustration from my imagination, first layer: texture in the
kitten’s fur

Illustration with kitten, end result
As I said, there are many different ways to work with watercolour
pencils. I’ll tell a little about two of those.
You put lines, dots, shapes on your paper and you want them to stay
right there where you put them? So you won’t use a brush; the brush moves the
colours a little from their original place. I use a spray bottle then. The
drawing is flat on the table and I spray a mist of clean water over it. The
drawing stays in place until it’s dry. The water changes ‘pencil’ into ‘paint’,
but the drawing will stay as it was.
You want unexpected effects? Make your paper all very wet and start
drawing with watercolour pencils. When the core of the pencil is really wet you
can even ‘paint’ with it! Just try this!
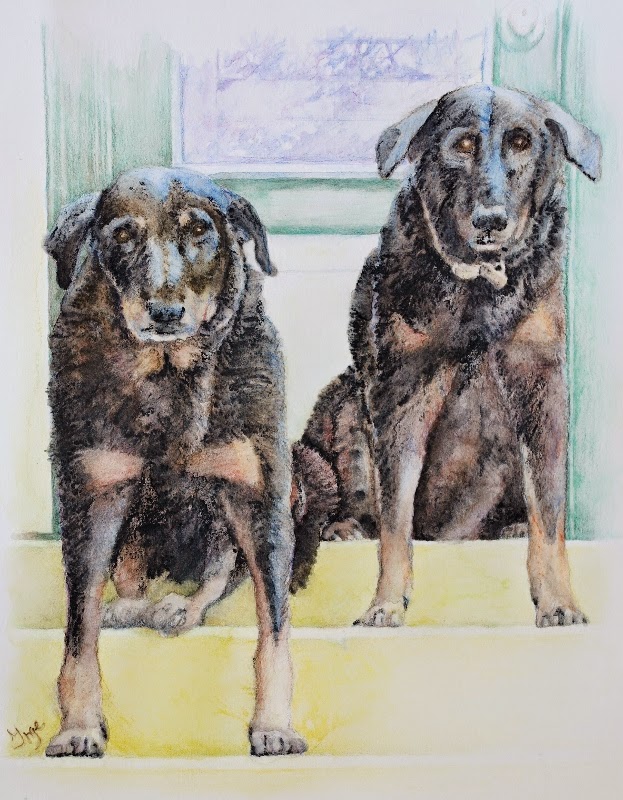
Two dogs, added more black at last with wet black watercolour
pencil
Geen opmerkingen:
Een reactie posten